
Our FTC disclosure's magnum opus awaits here. The following article was last updated on Dec 15, 2021 ...
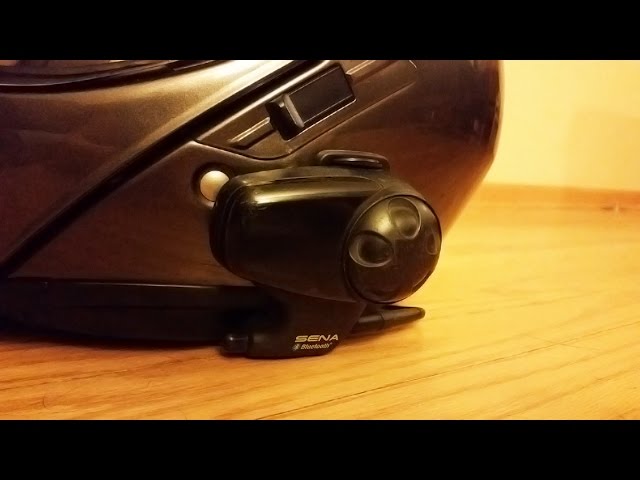
Sena SMH10 Intercom Battery Replacement
Some time ago, Travis Burleson wrote instructions on how to replace the battery in a Sena SMH5. Since then, a lot of folks have succeeded in doing so, often with a "better than new" battery life. Some of our regular visitors have mentioned the same concerns for Sena's SMH10 units, so we thought it appropriate to write a complimentary post, complete with video.
“Our regular visitors have mentioned concern over replacing the battery in their Sena SMH10. Follow these instructions to get the job done!”
While these battery replacement instructions are similar, even the slightest difference makes it worth covering so as to avoid any pitfalls/complications. The Sena SMH10 battery dimensions, for example are significantly different and labeled as such. For this tutorial, we'll be using this battery, an Ofeely 3.7V 560mAh "602248" lithium polymer "li-po" rechargeable lithium ion.
As with most things electrical, many steps should be taken with safety precautions in mind. Below is a list of everything you'll need to get the job done. If you're already soldering-savvy and aren't in need of any rudimentary introduction, skip the shopping list and cue the video to the 1:50 mark.
Tools and Materials

- Sena SMH10 unit
- replacement battery #602248 (Width | Length | Height)
- precision screwdriver with T7 bit to remove the fastening screws
- X-Acto knife to separate the backing from the surrounding shell
- wire tool to cut and splice the connections
- electrical multimeter only mentioned here! Check your *new* battery's polarity just in case!
- electrical tape to cover each connection after cutting/splicing
- black and red heat shrink tubing
- hair dryer or heat gun to collapse the heat shrink tubing
- solder paste to insure the process is gentle and simple (thin wires!)
- alligator clips in case keeping the wires in place while soldering proves difficult
- soldering iron that's small enough to respect the angel hair battery wires
- double-sided foam tape for mounting the battery in place
- patience (and a lot of it!)
Steps to Replace
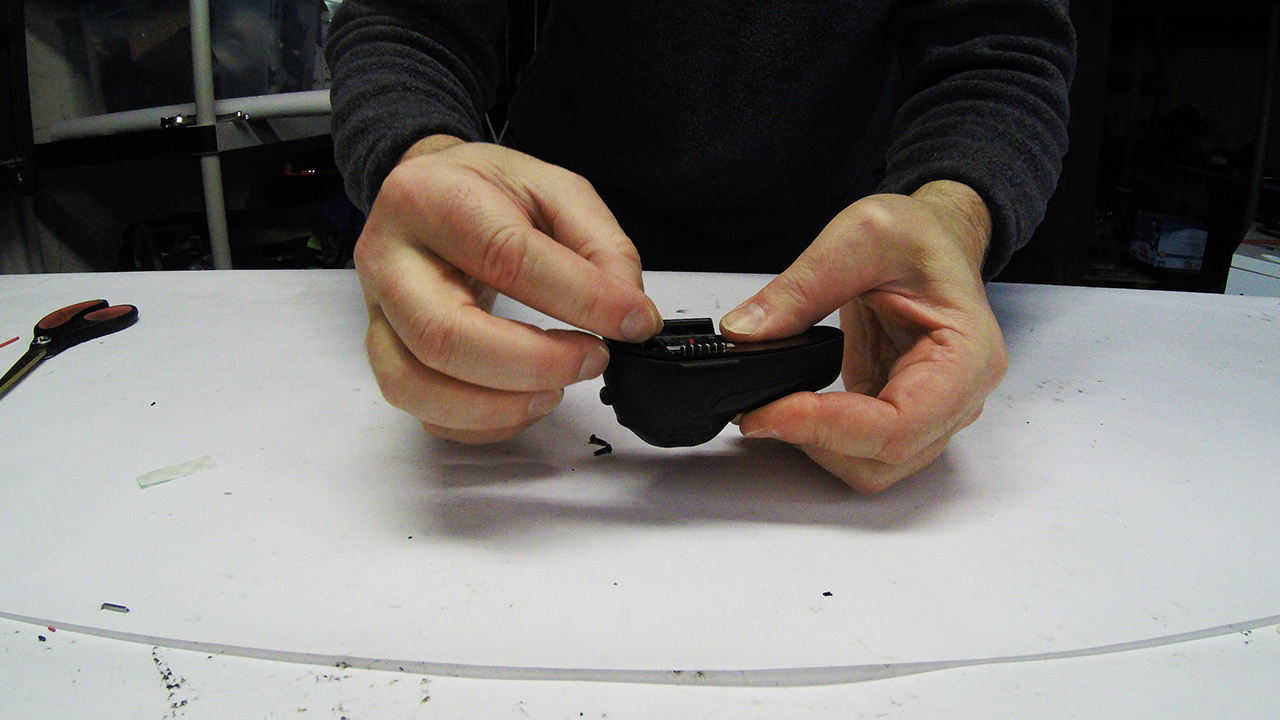
First, remove the rubberized weather seal from the charge port. It's held in place by a tiny lip that can be reconnected with ease. Next, using your precision driver, remove the three T7-bit jewelry screws from your SMH10's backing.
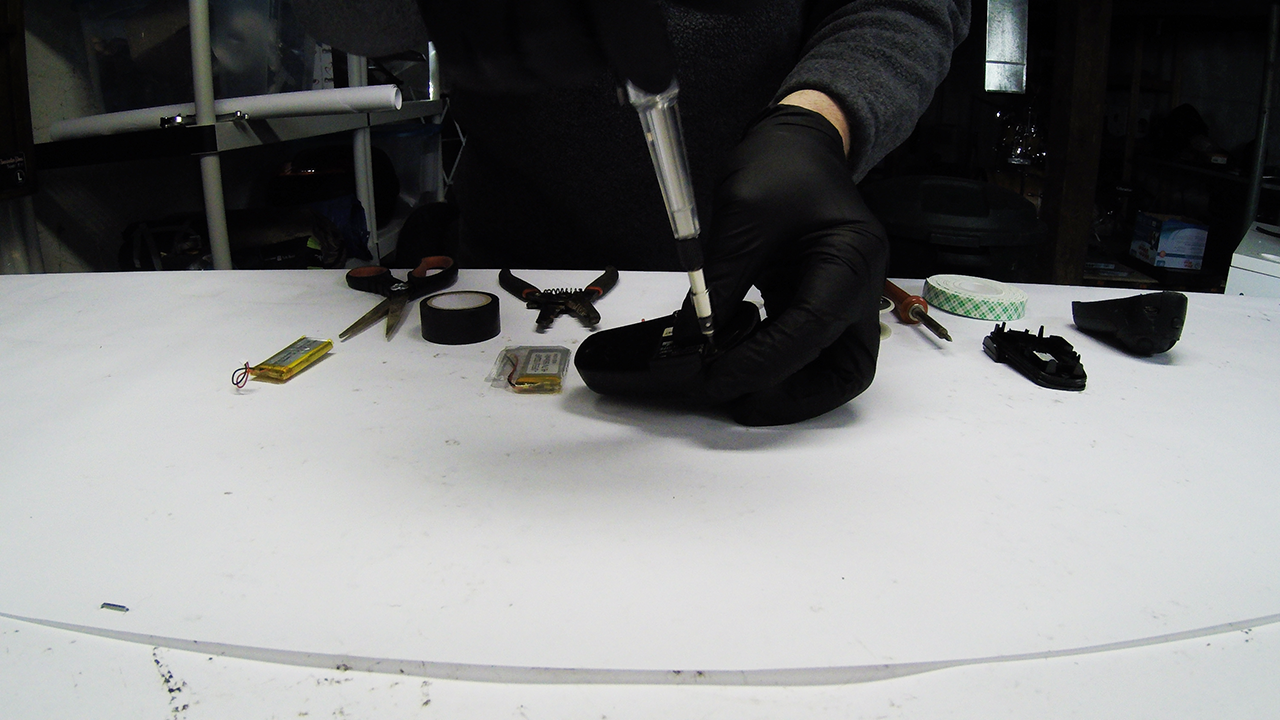
Now grab your X-Acto knife and use it to carefully separate the circuit backing from the outer cover. Don't insert it too deeply as there's a soft silicone weather seal that protects your unit's interior from rainy weather. One shallow press and twist is enough.
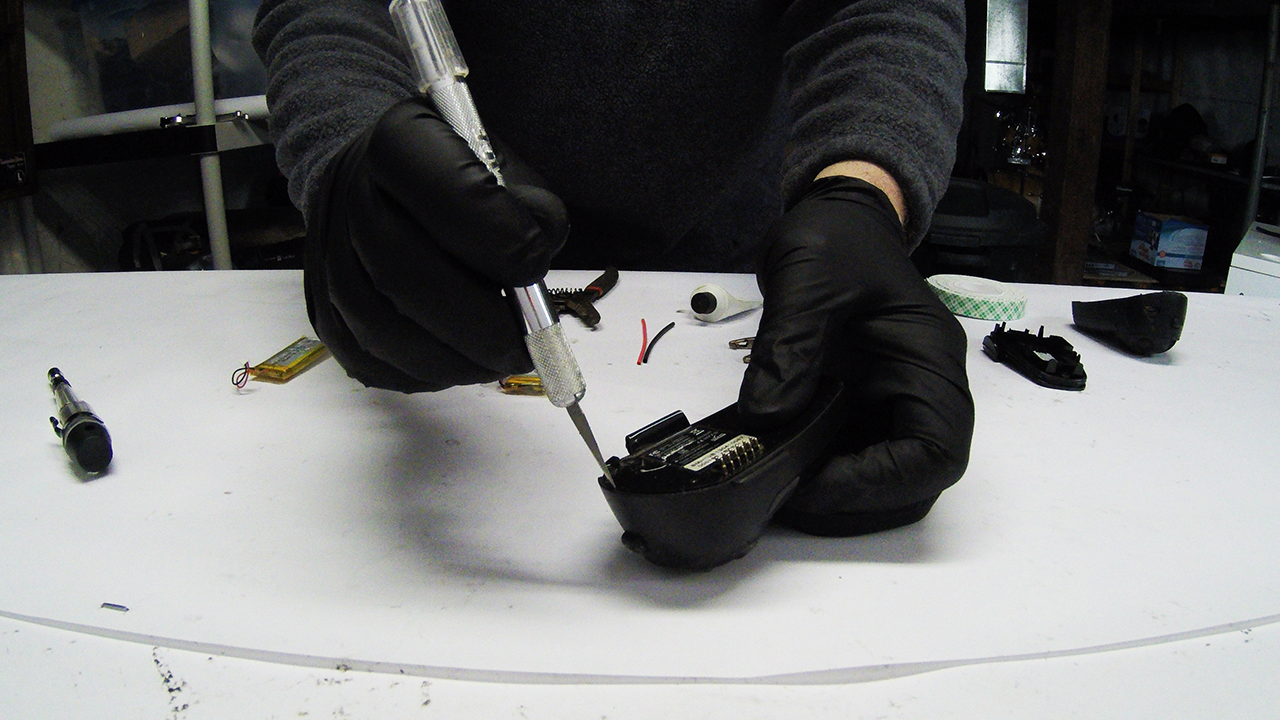
Using the helmet clip-connector as a grab, gently tug/wiggle the base free. Don't pull too hard and don't completely separate it! The battery's mounted on one side while plugged into the other.
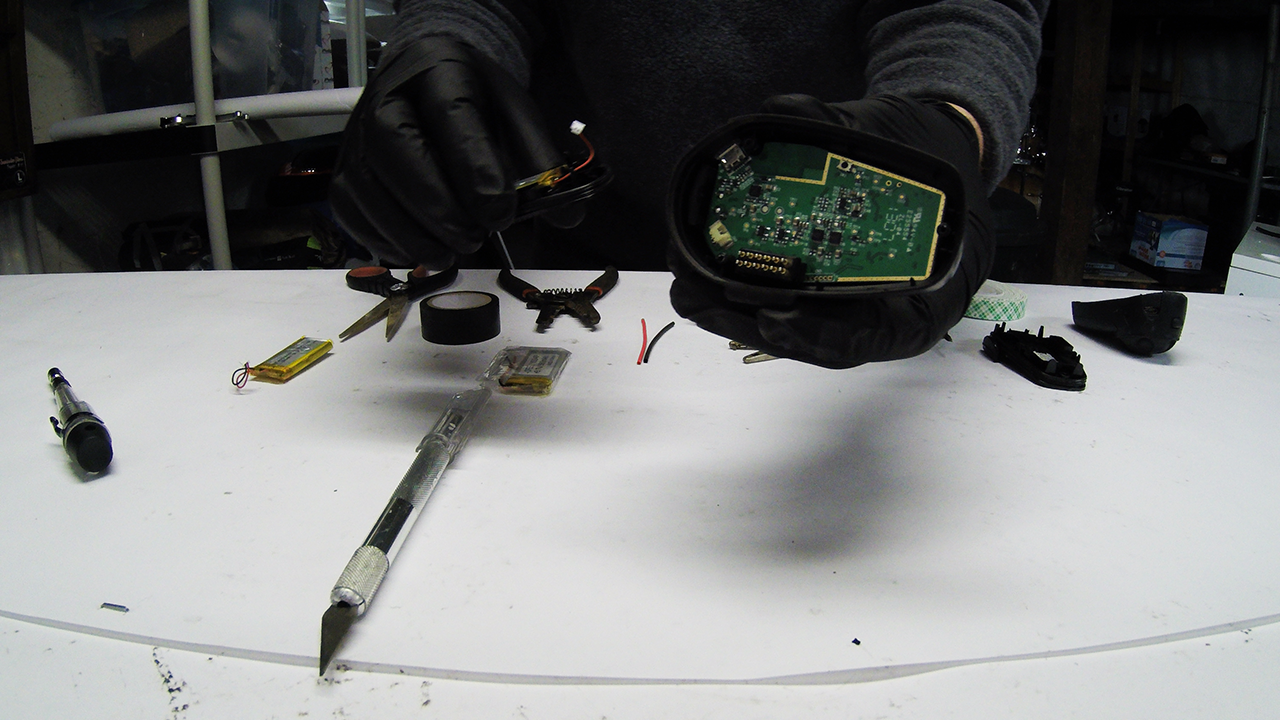
To disconnect the old battery and completely separate each side of the casing, press down on the molex connector's two tiny nubs while pulling back and away from its outlet. Now you can use your X-Acto blade again to slowly pry the battery away from its mounting point, sliding through the tape that holds it in place. Once done, set the battery aside as we'll be needing parts from it.
Electrical tape at the ready, it's time to cut the red/black wires from the old battery. Snip the red wire first before immediately taping over the exposed end that remains on the battery. Assuming that's covered, do the same with the black wire.
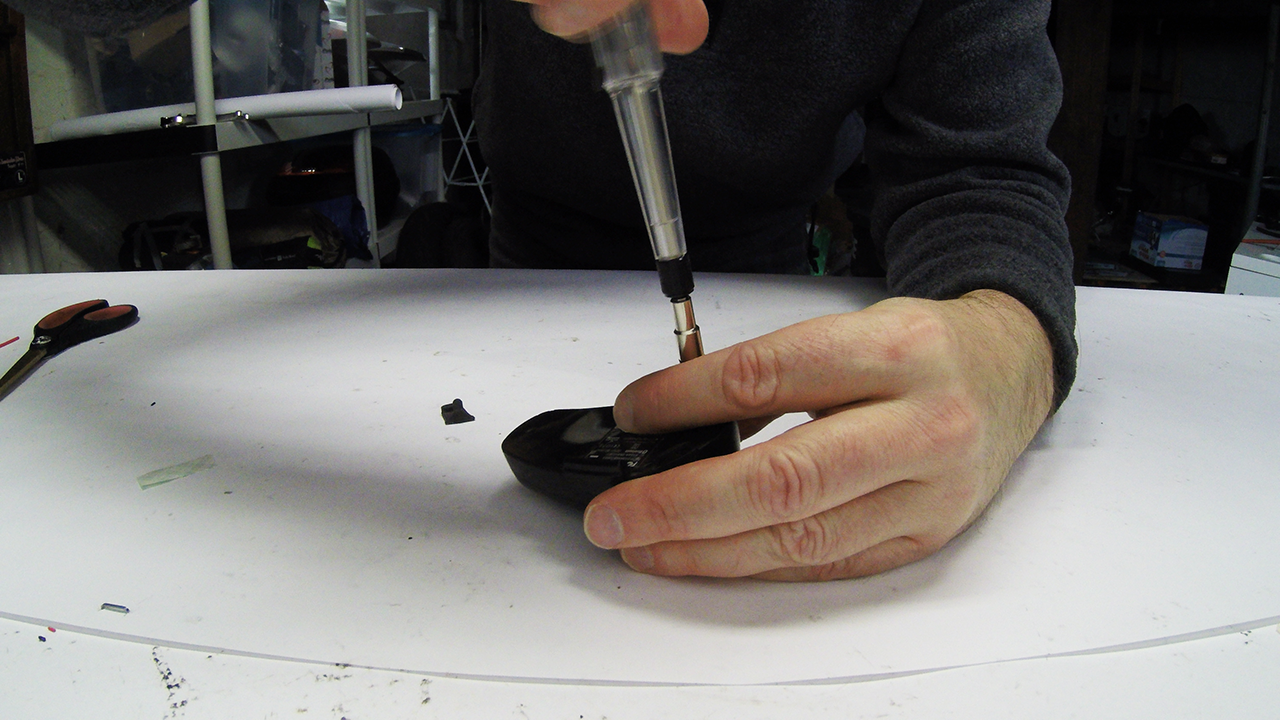
With your wire tool, remove enough of the old battery connector's outer jacketing to be solder-friendly. On your new battery, do the same but only to the exposed black line. It's solder time!
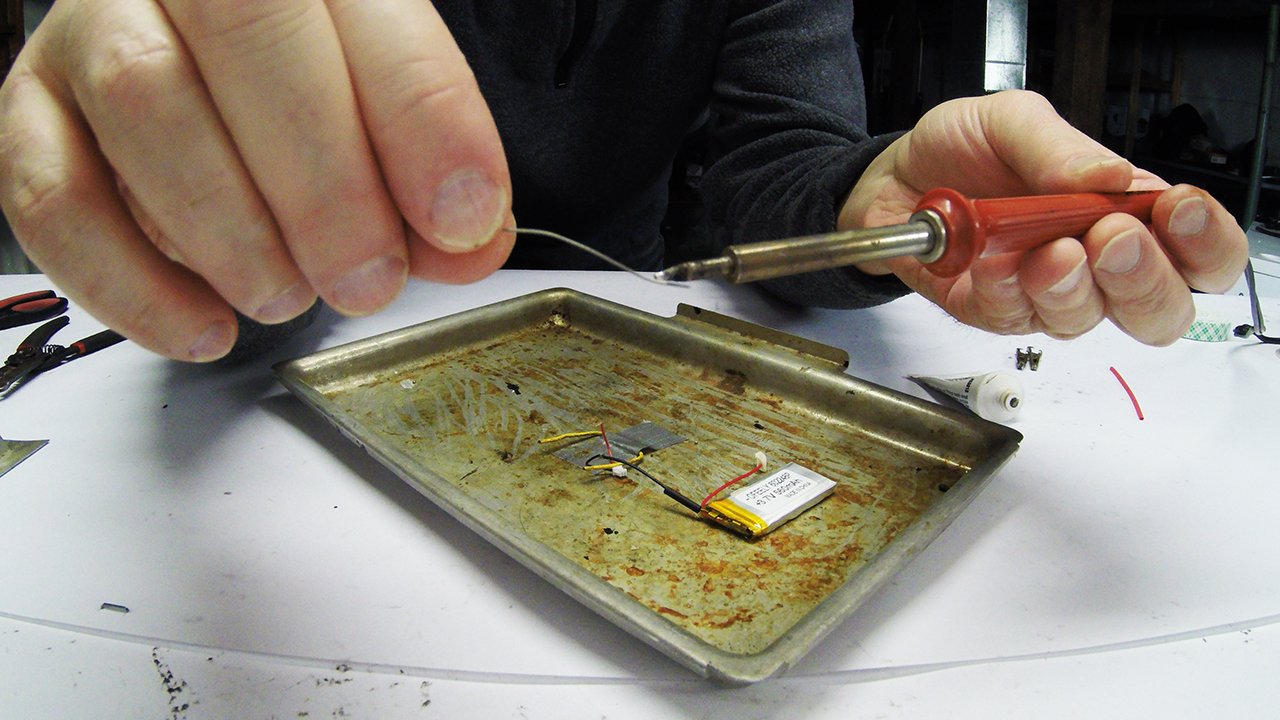
Placing a sheath of black heat shrink tubing over whichever side of the black line is longer, coat each side's bare wire in a light amount of soldering paste before braiding them together (in as much of an aesthetically pleasing way as you can). Heat your soldering iron and tin the tip. Without ever touching that blazing hot iron to those tiny, fragile wires, apply only enough solder to the iron and lightly cook into the paste at the connection point.
This is more than enough to maintain a working and reliable electrical circuit.
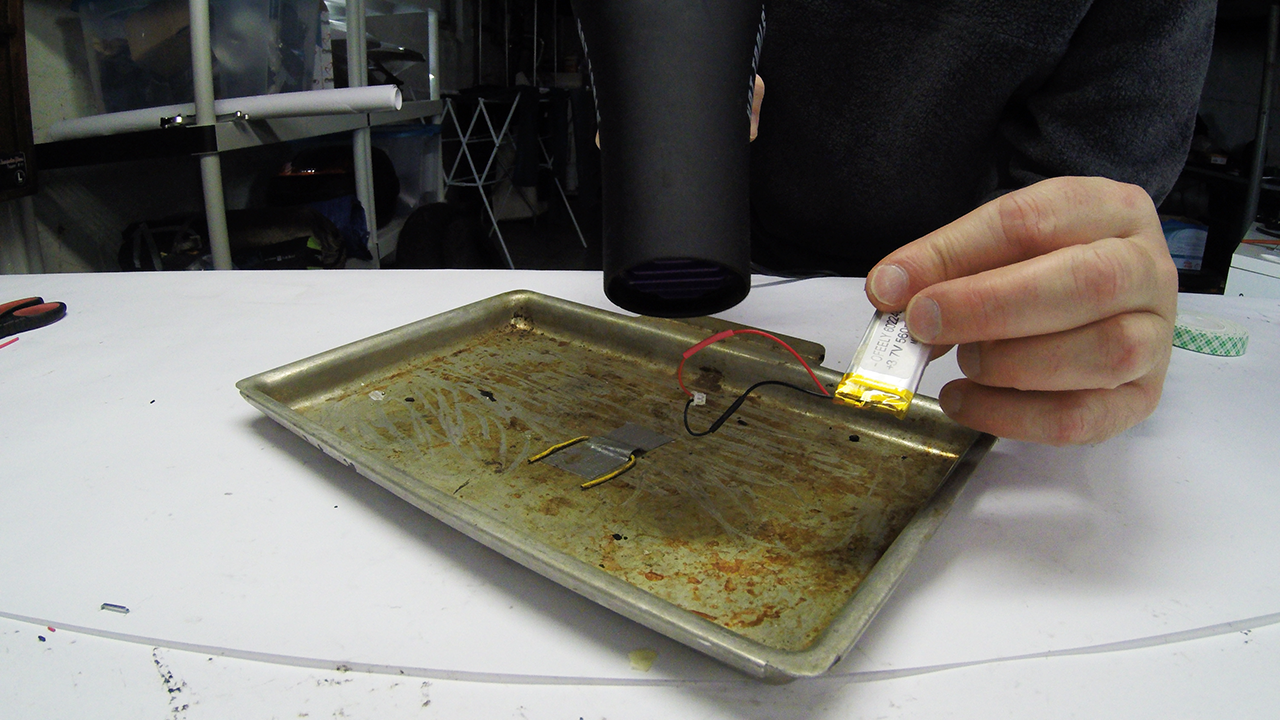
Now pull the heat shrink tubing over the solder point and bake it down to size using a hair dryer or heat gun. Once uniform, pull the tape from the new battery's positive red and repeat the steps above (substituting red heat shrink tubing for black, of course). Your battery is ready to install!

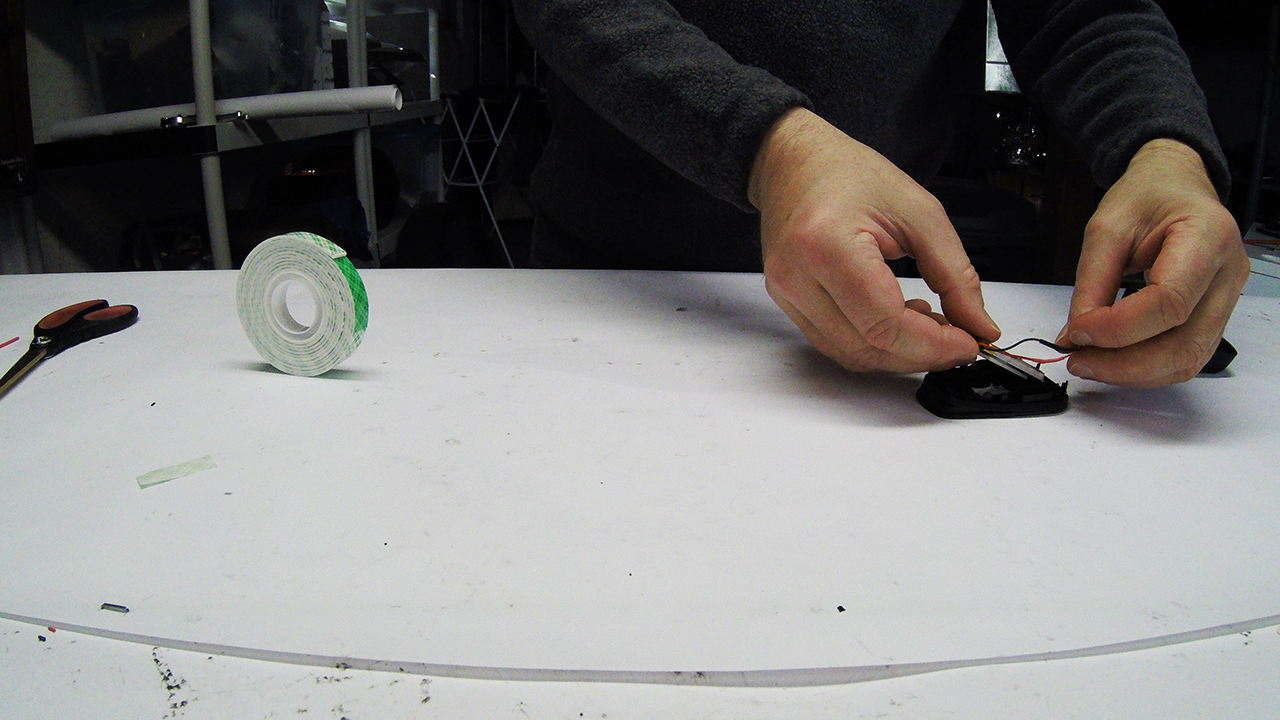
After adding a comparably relevant piece of double-sided foam tape onto whichever side of the battery doesn't show the relevant product numbers (might help to see those in the future), gently compress your new battery into its original slot. There are two cutout sections designed to route the wires without pinching them. Take your time figuring out whichever placement scheme best compensates for each line's extra slack.
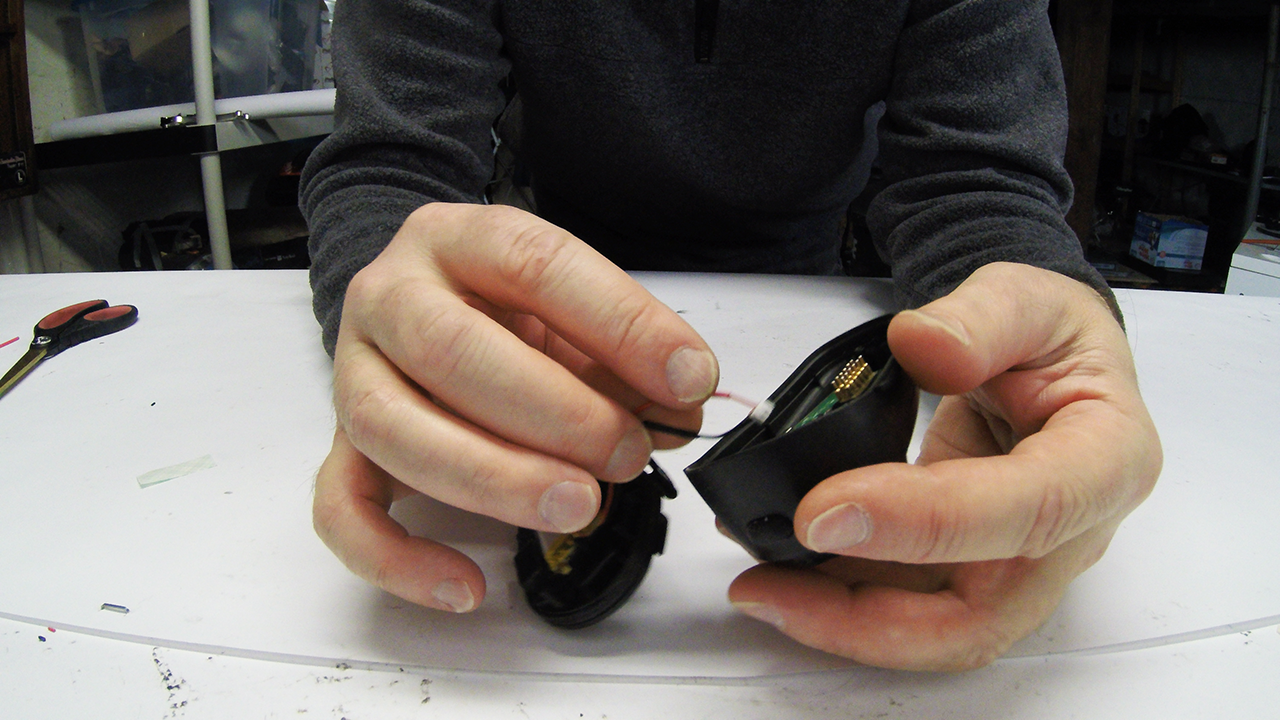
Double check that your weatherproof seal is properly placed before plugging the molex connector back into its designated outlet. Carefully and with minimal pressure, bring the outer cover (circuit board) into position over the SMH10 backing (battery). Install the T7 torx screws once more and torque conservatively, returning the charge port seal to its functional location.
Feel free to power it on for a brief moment to insure all is well. Afterwards, plug it in until fully charged. Congratulations on your new battery installation!

What Electronic Accessories Have You Repaired?
No product is perfect. Sometimes things break. What fixes have you come up with? How reliable are/were they? Your input is invited. Leave a comment!
Share Link ...

About Robin Dean
Motorcycle advocate, enthusiast and traveler. Founder, The Riding Obsession (2014). MSF RiderCoach credentials: BRCu, BRC2u, MSRCu, ARCu, 3WBRCu ~ Tidal Playlist

Comments
Hey there,
I have a Sena 10C and want to replace the battery but I can't find a battery online that is as small as the one that Sena uses. It's 3.7v and 1000mah. 38.5mm x 29.75mm x 9.65mm. Anyone have any ideas on where to look online to find one?
Thanks!
Hello, chupa88!
My own efforts to seek out a battery based on the info you've provided returned nothing as well. HOWEVER ... hope is not lost. I'm of the opinion that we're missing some key ingredients.
You're going to want the information that's written on the battery itself.
Carefully go through the motions of opening your Sena 10C. Next, remove it's battery and take a few smartphone pics of each side. If the battery is still working (limited or not), piece everything back together and restart your online search using the numeric information you found.
For BOTH the Sena SMH-10 and SMH-5, I found that the numbers written on the battery gave me a few options around the web. The only PROBLEM with those options? Many were too big - BUT - it became far easier to widdle things down to that more exact and fully compatible purchase.
If you provide said information, I'll hunt around the interwebs as well and report what I find.
Hi again,
The battery info is XK 903242 150118. I haven't been able to find much. Hope you will have better luck!
@chupa88 Did you ever get this resolved?
I think I may have found a battery replacement.
Hi folks,
Sena 10C owner here looking to replace the battery with a hopefully larger capacity one.
Still researching. In the meantime, here is a video (in Arabic {I think}) that shows a tear down
https://www.youtube.com/watch?v=JL1WefbjxM8
and here is a screencap from that video showing the battery and the info on it.
I'm considering a magnetic micro USB adaptor that will stay connected to the port (somewhat water-proofed with some shrink wrap) which would let me snapping a power bank on to it when I'm wearing the hat and gloves.